Sunday, September 29, 2013

Sock Snake Tutorial

I finally found a tutorial that will help to use up the basket of socks that is multiplying on my dryer. Mismatched, no match, and outgrown children's socks have it filled to the brim with a few falling out and over the sides. I didn't want to just toss them away. Now I am glad I held on to all of those persistent socks! Now I can turn them into giant, as long as I want, SNAKES!


http://www.grosgrainfabulous.blogspot.com/2013/05/mismatched-socks-sew-sock-snake.html

I have two little guys and 3 big guys in my life that I need to find things to make for Christmas. I can see two long snakes on Christmas morning slithering down the stairs or draped on the Christmas tree with bright bows. I imagine they will become favorites for bed and couch snuggles or even as curled up pillows.

She has a complete tutorial that features step by step pictures from cutting the socks to attaching the tongue

Can't wait to find more crafty presents to feature and next week I will start with Halloween tutorials from all over the web! Sign up to have them delivered straight to your email.

Tuesday, September 10, 2013

Socks to Stick Horse

http://www.thecountrychiccottage.net/2013/04/diy-sock-stick-horses-tutorial-with.html

DIY Sock Stick Horses Tutorial from The Country Chic Cottage @countrychiccott

I love stick horses for little ones and easy to make projects. This tutorial combines both in one. Using a men's sock, a Styrofoam ball, large key rings (I purchased at Krengel's True Value where I work)and a dowel this guy can clip clop his (or her) way into your little one's heart.

The tutorial is detailed in the best way with step by step directions and a photo of each step. One of the best Stick Horse tutorials I have seen.

With Christmas on the way I will try to feature ways to create inexpensive and easy presents for everyone on your list!


Sunday, August 25, 2013

Anklet Tutorial

I absolutely love jewelry tutorials that make it not only look easy but are easy to reproduce. I have been looking for an easy to recreate anklet for a while. I keep getting asked why I am not making more anklets for my store. The truth is summer leaves me so little time I haven't even posted anything new for sale on my store at all this summer. But, these anklets are a great jumping off point!

DIY easy bead anklet | Henry Happened

http://www.henryhappened.com/diy-easy-bead-anklet.html

Quick create as many as you can before snow starts falling!

Friday, August 23, 2013

Make your own Sock Monkey Family


My little guy will be turning 8 in a couple of weeks and I needed a couple new ideas for birthday presents for him. While searching online for something you could make for a boy not involving weapon creation I found this amazing blog and tutorial. I can't wait to create an entire family for him and his little brother to play with (info on making larger and smaller monkeys is in the tutorial).

The stripes on these guys give them a nice modern twist. I think I may stock up on stripes and furry socks to create this family of monkeys. She has other tutorials for a cat and a bunny that you can make from socks too. I bet the cat would be extra cute with a fuzzy sock!

Here is today's link:
http://www.craftpassion.com/2012/04/how-to-sew-sock-monkey.html/2

Sunday, August 11, 2013

Menu 2


No fail fish cakes

2 can tuna           1 package stuffing  1 c shredded cheese      ½ c shredded carrot

1/3 c mayo          ¾ c water

Mix ingredients and refrigerate for 10 min. Use an ice cream scoop place in a skillet sprayed w non stick spray. Gently flatten w spatula. Cook 3 min on each side or until brown.

Serve w fruit and vegies

Taco Salad

6 tortillas             1 TB chili powder             1 lb ground beef         1 cup match like carrot sticks

½ c plus 2 TB of salsa      2 TB mayo           4 c salad greens                1 lrg tomato

Shredded cheese            ¼ c cilantro

Preheat oven to 425 and crumple 6 large sheets of foil to make 6 3 in balls: place on baking sheet. Place a tortilla on top of each ball: spray  w cooking spray. Sprinkle evenly w chili powder. Bake 6-8 m until golden brown. They will drape as they bake. Meanwhile: Brown meat w carrots and 2 ½ tsp of chili powder. Add ¾ c of salsa. Cook 2 m until heated. Mix mayo, 2 TB salsa in a lrg bowl. Add salad greens and toss to coat. Spoon into tortilla shells, top w meat, cheese, and cilantro.

Tomato and Spinch Pasta Toss

2 c uncooked past            ½ lb Italian sausage        1pckg of baby spinach leaves

1 can 14 ½ oz diced tomatoes w herbs 1 c shredded mozzarella 2 TB Parmesan

Cook pasta in boiling salted water for 10 m. Crumble meat into skillet, cook 10-12 m; drain. Add spinach and tomatoes; cook 2 m until spinach is wilted, stirring occasionally. Remove from heat; cover to keep warm. Drain pasta and return to pot. Add meat mixture and cheese; toss lightly. Serve w salad and sliced cucumbers.

Cheesy Chicken Roll Ups

8 flour tortillas                  ½ c salsa               2c chicken           1 c shredded cheese      2 c shredded lettuce

1 tomato chopped           1 avocado chopped

Preheat oven to 350 Top ea tortilla w salsa and chicken. Fold like a burrito. Arrange in 8 in sq baking dish seam side down. Sprinkle w cheese. Bake 15 m or until cheese is melted. Sprinkle w veggies.

Pulled chicken sandwiches

2lb chicken         1 onion sliced    1 c barbecue sauce          1/2 c water         2 TB brown sugar             1 French Bread                  sliced cheese

Cook chicken and onions in a skillet on medium high for 8 min stirring occasionally. Add barbecue sauce, water and sugar; Stir. Reduce heat to medium; cover. Cook an additional 7 m until chicken is cooked through. Remove chicken from skillet. Shred chicken w 2 forks or chop into small pieces. Return to skillet; stir until evenly coated w sauce. Cut French bread until sandwich sizes. Fill w chicken and top w cheese.

Cheddar Macaroni Beef Casserole

2 package macaroni and cheese       1 lb ground beef              1can stewed tomatoes                

½ t oregano or basil        1 c shredded cheese

Preheat oven to 400 Prepare macaroni wout the butter. Brown meat. Drain, add tomatoes and basil. Boil. Add to macaroni. Spoon into baking dish sprinkle w cheese. Bake 10 m until cheese is melted and heated through. Serve w vegies

Saucy Pepper steak

1 bell pepper, cut into strips      1 red bell pepper, cut into strips                              1 yellow pepper, cut into strips

1 sm onion , cut into strips          2 lb sirloin steak cut into strips                  3 cloves garlic, minced

1 t black pepper               6 TB soy sauce                   ¾ c barbecue sauce         4 c cooked rice

Heat skillet sprayed w cooking spray on med high heat. Add bell peppers and onion; cook and stir 6-8 m. Transfer to large bowl and cover w tin foil to keep warm.  Add meat, garlic and black pepper to same skillet; cook and stir 4 m. add soy sauce; cook 2 min or until meat is cooked through, stirring occasionally. Spoon meat into bowl w vegies and mix together. Serve over rice.

Sunday, August 4, 2013

Menu week 1

I create a weekly menu to make life easier on my husband and 2 adult sons when I work late. Having a planned menu each week makes dinner less stressful for my guys who really aren't into trying to figure out what to eat just eating. I love it too! When I get home dinner is cooked and ready!


Sunday

Speedy Stroganoff
(From the Gooseberry Patch Cookbooks, Dinner$ On A Dime)

1 lb ground beef
1 onion diced
2 t paprika
1 t salt
1/2 t pepper
10-3/4 oz can cream of mushroom soup
16 oz container of sour cream
cooked egg noodles ( we make enough for 6)

This recipe I make with 1.5 to 2 lbs of ground beef, 1 chopped green pepper, and 2 cans of the cream of mushroom soup to make it stretch for 3 adult guys, myself, a 7 yo, and a 5 yo.

I also mix up the rest of the recipe as follows:

Cook noodles. Fill a large pot with water on medium high until water boils. Add noodles (read directions to find out how many noodles to add). Cook for 10 minutes. Drain using a colander in the sink. Add a little bit of olive oil and mix w noodles to keep them from sticking to each other. Sprinkle with salt and pepper and mix.

In a large pot brown ground beef and drain (On medium). Add spices and mix them in.

In a separate pan cook onion and green pepper w a little olive oil to keep from sticking (On medium). I like mine slightly browned or caramelized. Add to pot of cooked hamburger.

Add both cans of cream of mushroom soup (can use 2 cans of cream of anything if needed) to the pot. Heat on medium until warm. Stir in sour cream. Serve over the cooked noodles.

Serve with salad and sliced fruit.

Monday

Hot Dog Day!

2 packages of hot dogs
package of hot dog buns
bowl of grated cheese
mustard, ketchup, mayo
diced onion

Instead of boiling my hot dogs I like to split them in half and warm them in a frying pan. They get a touch of brown on them that is slightly sweet that the kids love this way. Place hot dog on bun (or not on bun depending on kid). Add preferred toppings.

This is a cheat meal for us so we will often have it with fruit, carrots, and a handful of chips. You can even use the chips as a topping!

Tuesday

Taco Day

My family loves tacos but they something that is easy for them cook and quick for hungry tummies.

1 lb of hamburger (we use 2 lbs, if you are not sure that you will have enough meat you
 can easily mix in a can of black beans or cooked rice to stretch it out)

1 bottle of La Victoria Taco Sauce
1-2 boxes of taco shells
1 bowl of grated cheese, about 2 cups
dice 1/2 an onion
bag of salad or a head of lettuce that has been chopped up
sour cream

In a large pan brown hamburger and drain, cook over medium heat. Once drained add bottle of taco sauce and mix. Taco Meat is ready to serve. I usually grate my cheese and chop the lettuce while the hamburger browns.

Add meat and toppings to shells and serve. I will often pair this with rice that I have added salsa too for a quick almost Spanish type rice and fruit.

Wednesday

Chicken Nuggets (these make a great lunch too)

1 package of chicken breasts (4-6 breasts)
2 cup of flour
4 t pepper
2 t paprika
1 t salt
1 t of chili powder
1 t of sage!
2 eggs beaten in a bowl
1 cup of milk

Cut up chicken into nugget size pieces. I will often cut it up into strips.

In a large Ziploc bag mix dry ingredients together. In another bowl mix egg and milk together.

Add chicken a few pieces at a time to the ziplock bag and shake to coat. I coat all of the chicken at one time and place in a bowl. Dip into egg mixture and return to bag, shaking to coat again. Remove from bag and let chicken rest for 5 minutes.

Add enough oil to coat the bottom of a large frying pan and heat the pan on medium heat. Add chicken nuggets carefully to pan. I like to cook them 5 minutes on each side. Use a meat thermometer to make sure the internal temperature reaches 180 degrees!

I usually serve with corn or string beans. But when in a hurry I will pull out a bag of carrots and slice a block of cheese into a few slices to put on the side.

Thursday

Frozen Pizza Night
 Not my favorite dinner as I prefer to make a homemade pizza but on Thursday's my husband needs something that is a no brainer. Open box, place in oven, and serve.

Friday

Crock Pot Roast Beef

I always purchase the cheapest per pound beef for this. Whatever you choose make sure that it is well marbled with fat. This will make sure it becomes tender without that dry grainy feel to the meat once it has been cooked.
Enough potatoes that have been washed an cut into quarters to cover the bottom of the crock pot.
1 quartered onion
1 package dry Lipton onion soup mix
1 1b of baby carrots
Bottle of Worcestshire


Place potatoes, carrots, and onions in the bottom of the crock pot. Sprinkle with Worcestshire sauce
 Add roast to crock pot with and sprinkle package of lipton dry onion soup mix on the top. Turn on high making sure lid is on the crockpot. Cook 6 -8 hours.

This makes delicious sandwiches the next day!

Saturday

Foil Wrapped Fish

4-6 fish fillets (salmon works really well for this too)
1 sliced onion
1/4 c margarine stick that has been sliced
1 lemon sliced
salt and pepper
1 bag of frozen California vegies

Heat oven to 375 degrees.

Place one fillet on top of foil that has been sprayed with non stick spray or brushed with olive oil. Salt and pepper fillet. Top with onion, lemon, and margarine slices. Fold foil over and tightly fold edges together.

Repeat for vegies using 1/2 cup of vegies per packet. Sprinkle vegies with salt and pepper, topped with a slice of margarine. Fold into packet.

Place packets on an ungreased baking sheet in the 375 degree oven. Bake for 15-20 minutes.


Thursday, July 25, 2013

Christmas in July with Rudolph

I have been thinking about Christmas ...a lot....lately. I hate having it sneak up on me and not have presents ready for my family and friends. I want to make everyone a cute Christmas decoration or a personalized stocking this year.

While I was waiting for two youngest to fall asleep tonight I searched online for Christmas projects. Look what I found!


Who wouldn't want to cuddle up with this guy on the couch? I am thinking about making one for each of my youngest as a Christmas Eve present for their beds to cuddle up with waiting for St. Nick. The back of the pillow would be easy to personalize with a different fabric for each family member or you could quickly embroider a name to the pillow. I think I may add a pocket for the boys
to store a reindeer snack that could disappear at night when Santa arrives.

The tutorial is easy to follow with lots of pictures and a complete list of items . She uses transfer paper but I wonder if you could print to freezer paper and use that instead? I think I may try both and let you know what happens.

I would like to point out the cute red pillow in the background with the adorable. Looking at it gives me that nice warm Christmas feeling.

Here is the link http://www.cottonandcurls.com/2012/12/rudolph-the-red-nosed-reindeer-pillow-tutorial/

Don't forget to check out the rest of her blog for amazing accessory and clothing ideas too.

Saturday, July 20, 2013

Drop Danish using Bisquick!

I have been using this recipe for over 20 years! I am not sure if my Mom and I first found it in a magazine or on the side of the Bisquick box. It is one of my to go to recipes when my sweet tooth is getting the better of me and I want something that is quick and easy.

You will need:

2 cups of Bisquick or any other mix of this kind
1/4 cup of margarine or butter, softened
2 Tbsp of sugar (I use 1/4 cup, don't hate me!)
2/3 cup of milk
1/4 cup of preserves or jam


1. Preheat oven to 450 degrees. Lightly grease a cookie sheet or baking pan.

2. Mix Bisquick, sugar, margarine, and milk together until a dough forms. You do not want to make sure that all of the Bisquick is completely mixed, it is ok to have a few dry round pieces in the dough.

This is what mine looks like after I mix it together.


3. Using a spoon drop the dough onto your pre greased pan about 2 inches apart. I can usually get 6 on a pan. Using the back of a spoon form a well in the back. Make sure that it is not so deep that your Danish will break when you remove it from the pan. Place a spoon of your jam or preserves in the well.

4. Place in the oven and bake for 10-12 minutes.
(Sorry about the pictures my hard drive is going out, nothing is working quite including photo editing)


Glaze Ingredients
 
3/4 cup powdered sugar
1 Tbsp warm water
1/4 t vanilla
 
Mix together in a bowl until the mixture is smooth. Drizzle with a fork over each Danish after they are cool.
 
 
As you can tell they are a big hit in our house!


Sunday, July 14, 2013

How to Organize!


http://www.noodle-head.com/2010/05/mail-organizer-tutorial.html

I have been going crazy trying to find ways to organize stuff in my house without paying a ton of money for it. I love this tutorial but I think I might change it up a bit to recycle some stuff I already have. I will try to post pictures as I go to let you know if using layers of cardboard will work for the back instead of a canvas. And  I would rather recycle some stuff that I do not wear anymore rather than spend more money on fabric. One of the reasons I love crafting is that I can find new ways to use things instead of purchasing more stuff!

Monday, July 1, 2013

Fourth of July Eats

What says 4th of July fun more than food? I can't think of anything! Here are a few of my favorite online recipes for the 4th.

Easy Taco Salad Flag - Super easy! Perfect of Memorial Day or 4th of July!
http://www.familyfreshmeals.com/2013/05/easy-taco-salad-flag.html


http://www.plainchicken.com/2013/06/patriotic-deviled-eggs.html


Ranch-Style Coleslaw with Bacon recipe
http://www.kraftrecipes.com/recipes/ranch-style-coleslaw-bacon-111386.aspx


Loaded "Baked Potato" Salad recipe
http://www.kraftrecipes.com/recipes/loaded-baked-potato-salad-124714.aspx


BBQ Chicken Burgers with Slaw by Rachael Ray 
http://www.foodnetwork.com/recipes-and-cooking/grilled-chicken-recipes/pictures/page-7.html?nl=FNW_070113_toprecipe2headline&sni_mid=86264&sni_rid=86264.501.437546&c32={78E046D9-47C9-4931-8356-7049D46797DB}


Smok'n Barbecued Ribs recipe
http://www.kraftrecipes.com/recipes/smokn-barbecued-ribs-118555.aspx


Sonoran-Style Hot Dog recipe
http://www.kraftrecipes.com/recipes/sonoran-style-hot-dog-119256.aspx


Star-Spangled STACKERMALLOW Treats recipe
http://www.kraftrecipes.com/recipes/star-spangled-stackermallow-treats-144612.aspx?cm_mmc=eml-_-rbe-_-20130701-_-1062&cm_lm=1FE7E724157E72407FE7089E5FCCEC71


Red, White and Blue Pinwheel Icebox Cookies
http://www.justataste.com/2013/06/july-4-dessert-pinwheel-icebox-cookies/


red_white_and_blue_dessert
http://what2cook.net/2013/06/25/red-white-n-blue-salad/


http://fancyfrugallife.com/4th-of-july-trifle-recipe/ This trifle gets gold stars because it is sooo easy!


http://www.babble.com/best-recipes/red-white-blue-jello-stars/


http://melaniescrafts.blogspot.com/2010/06/smores-on-stick.html Smores on a stick!


http://www.nestofposies-blog.com/2012/05/red-white-sweet-blue-ice-cream/


I also want to throw in this website for more ideas http://www.kraftrecipes.com/recipes/holidays-and-entertaining/holidays/july-4th-recipes.aspx. No I have no affiliation with kraft at all I just love their holiday recipes! They feature some main course ideas too such as a whole barbecued chicken. MMMMmmmmm.

Friday, June 28, 2013

Make Your Own Statue of Liberty Crown and Torch!


I have been trying to explain the meaning of the Fourth of July to my two youngest. What  The Declaration of Independence is and why it was important for us as a country. But finding things that are hands on for someone who just turned 5 and 7 has been hard. I can usually come up with an idea but keep drawing a blank for this one. Turns out the kids do not know who John Hancock is and weren't very interested.

I was so excited to find this blog with an amazing idea while I sat down tonight after putting them to bed. This was something big (a very large statue with a crown) that the kids could recognize! Easy to put together from paper plates and cardboard tubes. On my day off this weekend I may organize my two and the neighborhood kids to spend an hour or less putting these together. I am not going to promise how long they will be Statue of Liberty pieces before they morph into superheros but it should be fun....

Here is the link:

http://buggyandbuddy.com/crafts-for-kids-make-a-statue-of-liberty-crown-and-torch/

Happy 4th of July

Tuesday, June 25, 2013

4th of July Fun in a Jar!

4th Of July Mason Jar
http://www.thegunnysack.com/2013/06/4th-of-july-craft-a-gift-in-a-jar.html

I have been looking for something special to make for my family for a while. We really don't have a lot of traditions that surround the fourth other than watching the fireworks. As parents with full time jobs we usually end up working all day, rushing through dinner, sitting around, and finally packing everyone in the car for fireworks.

I love this jar idea! I can pack a bunch of great things for the kids to do during the day to help build their excitement for the end. The dollar store would be a great stop for the jar and a few goodies. I  think I may grab sunglasses, juice, hats, sidewalk chalk, flags, beaded necklaces, and more.

I also like the idea of throwing in a couple mini books or printed worksheets in the jar that have some background on why we celebrate this holiday. I think it would be nice to point out that it isn't just a summer holiday where we watch fireworks but an actual celebration of American History.

This would make a great party favor for adults too! Who wouldn't be excited to go to a great barbecue and get something packed with fun to take home or use that night.

I think this would make a cute decoration filled with red, blue, and white candy in stripes on picnic tables topped with a star.

Have a great 4th!

Monday, June 24, 2013

4th of July

Keep tuned this week I will focus on projects for the 4th of July!

Wednesday, June 19, 2013

Wallet for the boys or man in your life!


Who doesn't love an amazing wallet? I saw this easy tutorial and knew that I had to share it with you! I pinned this to pinterest around Christmas time and while searching for boy ideas stumbled across it again. I love Pinterest just for that reason. You can stuff all the things that you might want to look at again in one place and they fall back out just when you need them. Much easier than trying to look through my favorites.

One of the things that I love about wallets is that you can use remnants or scraps from other projects to make them.

  • 1/4 yard fall suiting fabric (tweed, plaids, etc., usually made from wool and/or synthetic materials)
  • Also try home fabrics, canvas, flannel, etc or my favorite something heavy out of the closet that no one wears anymore.
  • 1/4 yard lining fabric See ideas from above
  • scrap of leather (optional) Old purse from thrift store or your closet works too.
  • rivets, grommet (optional) The cheapest place to get this is at a hardware store instead of the craft store.
  • scrap of medium weight fusible interfacing or a piece of felt

  • walletinside

    Yep this is what you will be making for those fabulous boys and men in your life. I am thinking holiday and birthday presents!

    Follow this link to the step by step (with pictures!) tutorial: http://www.noodle-head.com/2011/03/celebrate-boy-tutorial-basic-boys.html

     Have fun crafting!

    Tuesday, June 18, 2013

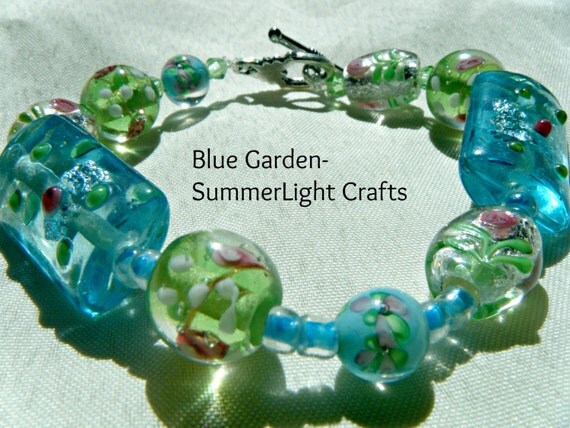
    Blue Garden Glass Lampwork Bracelet

    Blue Garden Lampwork Glass Beaded Bracelet
    Blue Garden Lampwork Glass Beaded Bracelet Blue Garden Lampwork Glass Beaded Bracelet Blue Garden Lampwork Glass Beaded Bracelet Blue Garden Lampwork Glass Beaded Bracelet
                
    Who wouldn't want to wear a garden on their wrist? A constant reminder that Spring and Summer are always around the corner with long sunny days filled with the scent of roses.

    Designed from green and blue lampwork beads this bracelet measures 8 1/2 inches in length. The bracelet can be customized for any size wrist. Created with Stretch Magic you can decide to slide the bracelet off and on or use the flowered silver clasp.

    The beads are each an amazing piece of art. Long rounded robin blue beads contain silver foil for sparkle offset with a rose red raised circle cornered in green. Clear green beads contain rose buds. Sky blue beads contain petals forming flowers. Clear beads with a silver foil center feature blooming roses.

    Thursday, June 6, 2013

    Garden Bracelet on Etsy

    Secret Garden Glass Lampwork Bracelet in cool Blues and Green
    https://www.etsy.com/listing/153303370/secret-garden-glass-lampwork-bracelet

    When you see this bracelet you will be taken away to a secret garden where the sound of water drifts by in the afternoon.

    The Bracelet is 8 1/4 inches long. If this is too large or too small let me know at checkout what size you would prefer and I will create the perfect size for you. The bracelet was created with Stretch Magic to give you the option of sliding it on and off with ease or using the stunning clasp.

    This bracelet is created from lampwork glass beads with perfectly blooming flowers inside. The largest focal bead appears to have a floating lily shaded in violet centered amidst blue. The side beads are a misty green with forget me nots. Past the solid blue beads that look like suspended drops of water are a longer misty green glass bead containing small pink roses. Next to the clasp are glass lampwork beads where the forget me nots appear above a blue background. The silver tone clasp is embellished in a floral and leaf design.

    I ship daily, First Class United States Postal Service, to make sure that your item will arrive quickly for you to enjoy or to give as a special gift.

    If you have any questions please let me know as my customers are my top priority

    2 New Glass Lampwork Bracelets listed on Etsy!

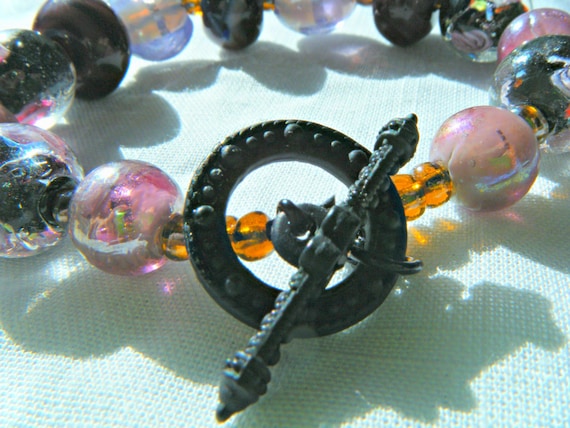
    Lampwork Bead Bracelet lavender roses black metal clasp with rhinestone adornment
    https://www.etsy.com/listing/153293323/lampwork-bead-bracelet-lavender-roses


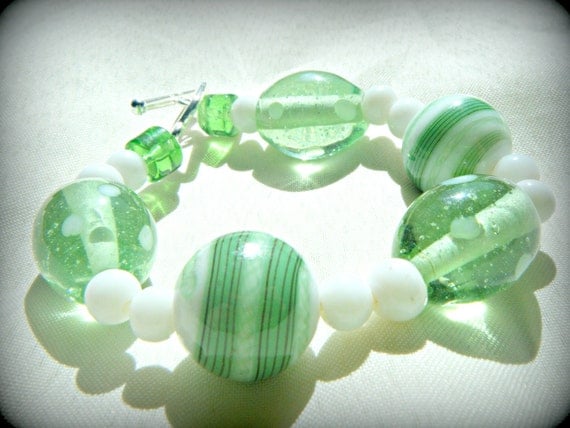
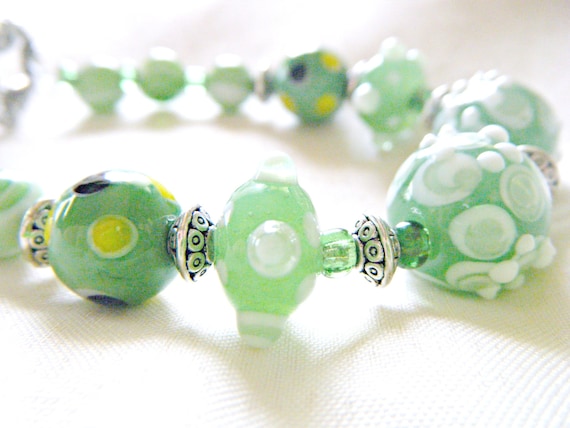
    Sea Green Glass Lampwork Bracelet w silver accent beads and toggle clasp
    https://www.etsy.com/listing/153292648/sea-green-glass-lampwork-bracelet-w

    Both amazing bracelets are $8.99.

    Saturday, June 1, 2013

    How to make your favorite Dad a shirt he will love...

    Blank Slate Patterns Free Men's Shirt Pattern and Tutorial on Melly Sews
    http://mellysews.com/2013/05/mens-shirt-pattern-tutorial.html

    I pinned this on pintrest at one time so that when I needed it I could find it again. And I couldn't find it. I was so happy to find it again today when looking through MellySews blog.

    She is like most of us and doesn't sew very often for the men in her life. She created an entire tutorial with a free pattern for a men's button up shirt that those of us who really do not sew a lot of clothing can still follow!

    I really like the idea of getting a chance to pick out fabric for my husband. He doesn't like stripes or logos but might want something that wasn't a solid color in grey, blue, black, white, or brown for a change. Ta Da! Melly Sews fixes the problem we have the guys in our lives with a little thread and time.

    If you haven't already subscribed to her blog it is amazing and I would suggest that you look around for other great ideas too. Off to the fabric store for me!

    Friday, May 31, 2013

    Etsy Shop Opening!

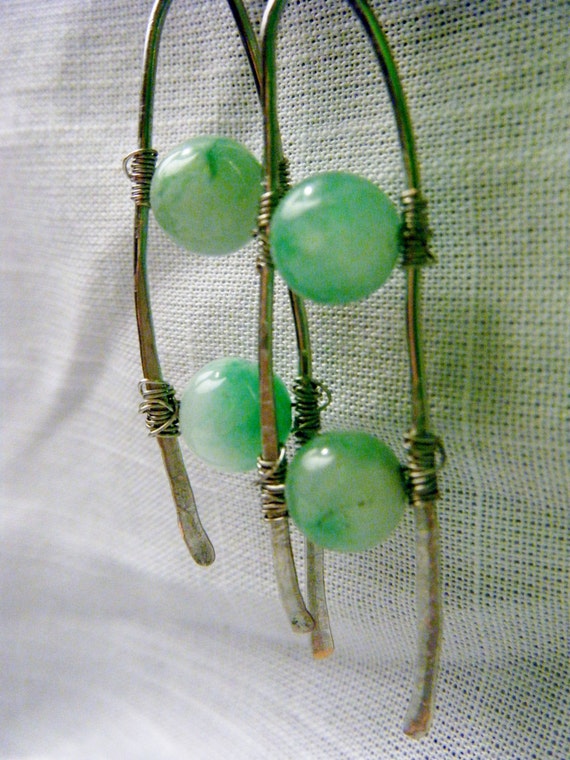
    Jade Earings Dangle within Hammered Wire Frames
    http://www.etsy.com/shop/SummerLightCrafts?ref=seller_info

    So excited slowly getting things posted to my etsy account to sell as I recently went through a name change this week and erased all my previous data! Slow work to build the stats back up but please put up with mess while everything including the banner undergo some major changes. Adding purses, superhero dolls, and more to my listings. Jewelry and beads for sale are currently being listed. If you are looking for something and unable to find let me know...I will always personalize for you or come up with a brand new design! My email is Lueanna@yahoo.com please include that you are purchasing or creating an order in your subject line.

    These Jade Earrings are currently posted for $14

    Thursday, May 23, 2013

    Shorts for Your Favorite Little Guy!!

    073frankies 4thbday1


    This is a step by step tutorial on taking an old dress shirt and creating  extreme shorts for your little guys!
     
    It is so hard to find ways to stretch a dollar when you have boys. There are tons of tutorials for little girls including making a dress from a pillowcase! Whenever I find something useful for boys I get so excited.....that might be because I only have boys....but still I get excited to know that here is something I can make and not break the bank.
     
    Even if your significant other doesn't have a shirt that he is willing to let you cut up there are always thrift stores and garage sales to check out. Let's face it any pair of shorts this cute less than twenty bucks is exciting. And we all want our little guys to look stylish. I know when I get to the store and start checking price tags I start doing the math and my pulse goes up. When you have to purchase 5 pairs + each season for more than one little person let's face it the price tag isn't all that reasonable for a family.
     
    This is why I love DIY ideas like this! You get to use your creative side and save money while creating something that your family needs. This tutorial is step by step with pictures and perfectly timed as Spring heats up. See you at garage sales this weekend!


    Tuesday, May 21, 2013

    Secret Book to Make for Father's Day June 16th!


    http://lifeartcollide.blogspot.com/2012/04/diy-secret-book-of-sinister-potions.html

    I thought we might want to get a head start on Father's Day this year. This book is perfect for the geeky at heart dad who loves all things hidden with a slight twist.

    This how to shows how this blogger took a paper Mache hollow book from Michaels and created this secret sinister book. The front was created with tissue paper, hot glue, hemp and wire pieces.


    Who isn't slightly geeky at heart and wouldn't love the inside of this book.The inside she created using sculpey, cardboard, felt, and leather straps. I think that if there was something that your "Dad" would love more on the inside this would be easy to reimagine. For the artist you could put tubes of paint and paint brushes. The gamer could have a strap for maps and character sheets and a small built in bag for his dice. The video gamer could have a secret place for that favorite controller that he wants to keep out of little sticky hands! The ideas are endless with this tutorial.....

    Friday, May 17, 2013

    Empire Waist Blouse Tutorial!

    Empire Waist Pattern
    http://www.crafthabit.com/2012/04/06/empire-waist-blouse-pattern/
    I am in love with this shirt. I am going to try to make this out of flannel. I know weird idea but I love flannel! And I do not have a good cotton right now but I really want this shirt anyway. LOL Complete pattern and tutorial!

    Thursday, May 16, 2013

    Make your own Stick-Horse!

    http://thatvillagehouse.blogspot.com/2011/01/diy-stick-horses.html

    I have been searching for a way to make a stick horse that isn't uhmmm too hard for a while. I wanted something that would be easy enough I wouldn't look at the instructions and just give up, walk away, and never want to try again. LOL
     
     At craft shows I see the most amazing stick horses but they also come with the most amazing price tags ...... I think my children are worth the price tag but my bank account and my husband like to argue with me.
     
    I have finally found the easiest tutorial and explanation on making these stick wonders. The creator of this tutorial made them for a birthday party! As I tried to wrap my brain around this idea and the sheer amount of work involved I became convinced that she should win a prize for greatest mother ever. And another prize for helping moms everywhere finally make their own stick horse!
     
    My littlest guy turns 5 in a couple weeks and he and his brother will be getting these! Now where to hide them while I work on them?
     

    Monday, May 13, 2013

    How to make a Full Size Diaper Bag!

    https://docs.google.com/file/d/0B7p_tCAzrm-cNTNhZmE3OGQtN2RmNi00YzI1LTgwZjQtYjVhZWVkYzU3MjIz/edit?pli=1&hl=en#
    Next for your and your favorite parent friends a Diaper Bag Tutorial. No more searching for the perfect bag, now you can find the perfect fabric instead. One for you and one for Dad.

    Two Pocket Diaper Holder!

     
    Too cute for words! Complete with pattern and tutorial you can make yourself or any mom just a little bit happier with this easy to carry diaper bag! The perfect size for that quick trip in the car when you really do not need the whole shebang of a large diaper bag. I like the idea of making one for mom and a separate one for dad.....